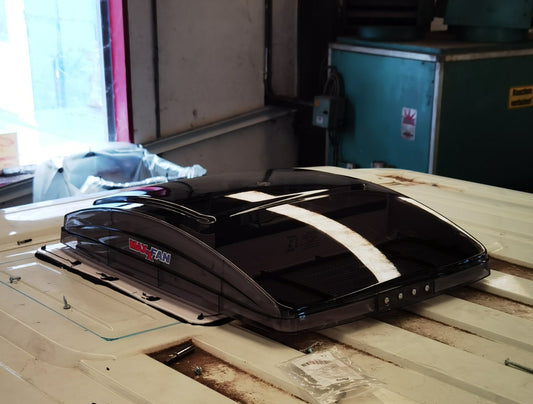

I fitted the MaxxFan Deluxe on the same day as the side windows. The roof vent is a central component for ventilation and moisture management: it ensures a constant exchange of air, reduces condensation and can also be used in the rain thanks to the hood. In the following, I describe the choice of device, the installation (including sealing with Dekaseal/Decasil) and the advantages and disadvantages in everyday life.
Unfortunately, I hardly took any pictures. I had made the frames incorrectly and this made the day very hectic, as we had to leave the rental garage and couldn't drive off without a fan on the roof (but with a hole). Cleaning the roof before the photo was also no longer possible.
Why the MaxxFan Deluxe?
- Rainproof: integrated hood, operation even in precipitation.
- Air in & out: blowing in and extracting, infinitely variable.
- Remote control: convenient control without standing up.
- Practical benefits: replaces an air conditioning system to a certain extent - no active cooling, but noticeably better temperatures thanks to air movement; goes well with a minimalist power setup.
Note: The MaxxFan is technically and constructively rather "US-American". This can be seen in the installation principle (see below), which differs from typical European roof windows.
Difference to window installation
With side windows, the screws are attached to an inner frame that is held in place from the inside; additional holes in the sheet metal are not necessary. The MaxxFan works differently, which I didn't take into account and was my undoing:
- On the inside, a wooden frame is first placed on the sheet metal as a base and glued in place.
- The fan flange is placed on theoutside; screws are inserted from above through the sheet metal into the wooden frame.
The result is mechanically very stable, but requires clean work when drilling and sealing.
So where was the mistake?
On the windows, the frames are only used to maintain the distance between the two frames. With the Maxxfan, however, the screws are also screwed into the frame, so the frame must be correspondingly wide. However, you should not overdo it, otherwise you will run out of space. It is therefore essential to check beforehand that the fan fits into the frame and that the screws also have enough chuck. My prepared frame didn't fit, so I had to make a makeshift one in the rental workshop. Unfortunately, there were no "carpentry tools" there - the result was correspondingly rustic. But in the end it didn't matter, the purpose was fulfilled and it was covered anyway. Afterwards, you shouldn't spend too long on the window frames.

Position & preparation
- Installation location: directly behind the cab. This leaves the rear roof area free (e.g. for solar modules or a later roof tent).
- Cut-out dimensions: 400 × 400 mm (standard).
- Tools: Cordless jigsaw; cutting area marked with masking tape.
- Chip protection: Interior covered with foil and magnets inserted in the foil so that metal chips stick and do not fall into the vehicle when removed.
- Corrosion protection: Cut edges carefully primed.
Wooden frame & sealing with Dekaseal/Decasil
After the cut-out, I drilled the holes for attaching the Maxxfan and treated everything with primer. I then placed the wooden frame (approx. 25-30 mm) on the inside of the sheet metal and glued it in place with mounting adhesive. Dekaseal was used to seal the fan flange. The application is important here:
- I applied two beads of sealant, each about 1 cm in diameter, to the underside of the fan flange and then placed the fan on top. This meant that the flange was already sealed all the way around when it was fitted.
- The sealant was applied using a high-quality cartridge press (better transmission ratio than cheap DIY store presses). This facilitates even beading and clean work.
Screwing & additional seal
Only after the flange was on the butyl did I put the screws in from above, which grip through the sheet metal into the wooden frame. I also sealed the screw heads with a little sealant. This probably wouldn't have been absolutely necessary, but it doesn't do any harm and potentially prevents moisture from collecting in the screw holes.
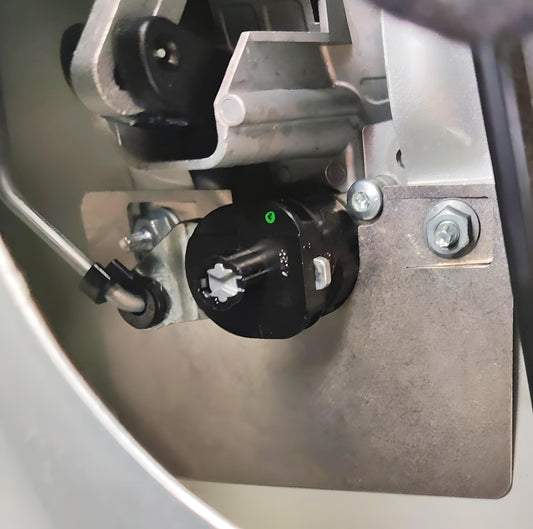
Electrical connection (prepared)
During installation, I initially only ran the 12 V cable into the interior. The final connection to the on-board electrical system was made later. The fan itself requires comparatively little energy, which fits in well with a rather lean power setup.
Noise when driving (important!)
One point that is often neglected in experience reports: driving noise at speed. In my position (behind the cab), the fan is clearly audible from around 90 km/h. The reason for this is its design as a forced ventilation fan: it is not completely sealed, some air always flows through.
- Sealing kit retrofitted: This has noticeably reduced the background noise, but has not completely eliminated it.
- Close the roller blind: Also reduces the level slightly.
- Optional measure: A foam panel between the roller blind and the fan would probably provide further insulation. I have not implemented this yet, but I think it is plausible.
First experiences in the stand
- Air exchange: very effective; noticeably more pleasant temperatures and lower humidity, especially at night.
- Operation in the rain: possible without any problems thanks to the hood.
- Appearance & installation height: visible on the roof, but practically uncritical.
- Noise during operation: depending on performance, from barely audible to slightly louder, but very pleasantly quiet in normal operation.
- We hardly ever use the automatic mode.
Conclusion
The MaxxFan Deluxe is a sensible investment if you value functioning ventilation and rain suitability. Installation is easy if you follow the typical US principle (screws from above into the inner frame) and the Dekaseal is cleanly finished. When driving, you should take into account the possible background noise from ~90 km/h; a set of seals and the closed roller blind help, but do not eliminate it completely.
The next article in the series deals with the electrics in detail: battery space under the driver's seat, charging booster, converter and planning the cable routes.